I admit it. I am a planner addict. Since I was in elementary school, I have used some form of paper planner to try and keep track of everything I have happening at any given time.
I back-up my engagements on my Google calendar, but there is nothing like having a physical representation of my plans, my to-do lists, birthdays, tasks, etc. This is my second time using a particular brand of planner and I could not be more pleased with mine for 2017. It arrived this weekend and I would love to introduce you to my planner after the jump!
I switched to Plum Paper after learning about it online. I loved the colorful, “happy” type planner I had been using and it was still all the rage. But, after three years, the company had made some changes that affected quality and I had grown unhappy with the covers. They switched from a well-constructed, durable cover to interchangeable covers. What this meant was the cover’s durability suffered greatly and within weeks of carrying the planner, my cover was flapping, flopping, peeling and looking horrible. Because I spend an inordinate amount of time selecting the cover design and colors and the planner was already $50, I could not see spending more money every few weeks to replace the cover. With the planner as it were, I couldn’t go into a meeting with that mess, so in August of last year, I put that planner down [with five months of unused pages] and began using my Plum Paper planner that I ordered with an 18-month time span.
To increase my personalization even more, I removed the wire coil, trimmed the fringe and hole-punched the pages to go into a planner binder. I had meant to order mine uncoiled this year, but forgot before I submitted my order. Oh, well! I’m so happy with my planner, I don’t care.
Three of my favorite things about this planner are: 1) the durable covers; 2) the personalization options for the planner’s layout and 3) the add-ins that can offer even further personalization. {Just click on the first photo in the gallery, arrow through, and then click the small x in the left hand corner to keep reading the post.}
Safe shipping
A sturdy cardboard box holds your planner. Perfectly sized, your planner won’t be rattling around in a big box.
Once you open the box, you will find your planner cradled in bubbled wrap.
After you open the little bubble wrap pouch, you will find your planner safely inside a cellophane wrapper. [Note: I have edited out my last name from the front of my planner.]
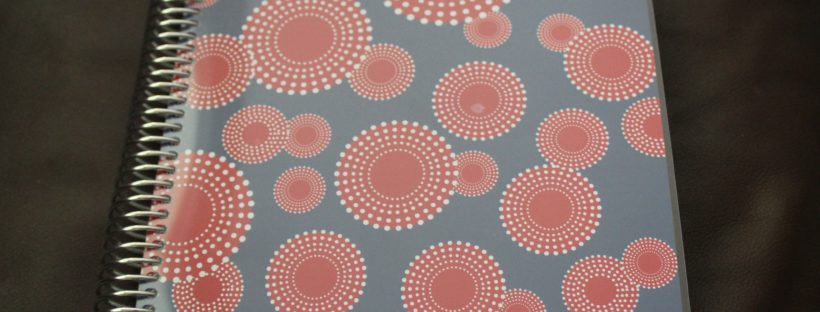
Is this GORGEOUS or what? You can request whatever color combination you want once you pick your planner’s cover design. I will typically send the color numbers and the designers are most accommodating. You can see the heavy clear cover that protects the actual printed cover.
Functional Standard Features
The front page of the planner offers a space to record identifying information in case you should ever become separated from your planner. {gasp!}
The planning calendar shows a full year-at-a-glance. This is handy on occasion.
A two-page spread offers space for recording special dates.
A closer look at the special date page.
Each month tab has its own color that corresponds with that month’s pages. It also features a monogram of the month’s first letter.
Monthly Pages
At the start of each month, you are given a page for setting out some goals and start-of-the-month objectives. This is a new feature that was not included in my current planner.
The two-page monthly spread seems larger to me this time–cleaner with more white space in each box. I’m loving this.
A closer look at what is included on the left-side of the two-page month-at-a-glance spread.
I love that the planner has the lead-up pages to the start of the month. Otherwise, there is too much flipping of pages and changes at missing important things. I love the extra room this gives me to record tasks, notes, etc.
Here is the two-page spread once the month is started–notice that the days are “active” in the color of the month rather than gray placeholder days.
A closer look at the left side of the weekly spread.
I love the colors & these tabs are relatively sturdy.
Meal Planning Add-In
Each add-in section can be placed in your planner with its own tab if you choose. Otherwise, you can request that the pages be spaced throughout the planner. Because I plan to remove the coil and place my planner in a binder, I chose a tab. I will keep all the pages there until I plan to use one and then move that page forward into the month where I want it included.
The tabs for add-ins also have a monogram and a pretty color.
This page launches the meal planning section–this will come in handy at the market!
A place to jot down what you need to make your meals happen.
Here is where you can plot out your menu week-to-week.
There are also pages to record what meals are a hit.
Fitness Add-In
Again, a tab to keep the fitness pages where I can easily find them when I want them.
The overall cover page for the fitness section allows you to keep track of ons of information.
I love the information that will be recorded here and this will provide a great overview of progress throughout the year.
Checklists!!
I could not be more pleased that there is a checklist add-in.
Another nice, monogrammed tab.
Would you look at this?! I am completely freaking out about all the awesome lists I am going to be able to create with these pages this year.
Final notes
This planner also has a year-at-a-glance page for 2018. The two-sided pocket at the back of the planner holds everything from postage stamps to receipts to planner stickers.
In addition to the floppy, cracking covers, my former planner also had coil troubles. It seems like Plum Paper has that down pat.
The back cover is as vivid and gorgeous as the front one.
 I admit it. I am a planner addict. Since I was in elementary school, I have used some form of paper planner to try and keep track of everything I have happening at any given time.


